
In this blog, we are going to see an interesting out-of-the-box Salesforce feature known as Reporting Snapshot or sometimes referred to as Snapshot Analytics.
Snapshot Analytics offers some advantages as well as disadvantages. Looking forward to the merits, Reporting Snapshots provide trends in the data over time by capturing data at different time durations and storing them to be referenced later, for example, the number of donations at the end of each consecutive week to monitor the need to generate more campaigns, income generated monthly by the company to monitor the gains, etc. which is not possible for standard reports.
Looking at the other side of the picture, Snapshot Analytics has some drawbacks also which includes a maximum limit of 2,000 records that can be captured per Snapshot.
Steps to create a Reporting Snapshot
Reporting Snapshots includes four key steps which includes:
- Creating a custom source report (It can either be a Summary report or a Tabular report).
- Creating a custom object with specific fields to store Snapshot data (Target Object)
- Mapping the custom source report summarized values to the created custom object fields.
- Scheduling Reporting Snapshots.
Creating Custom Source Report
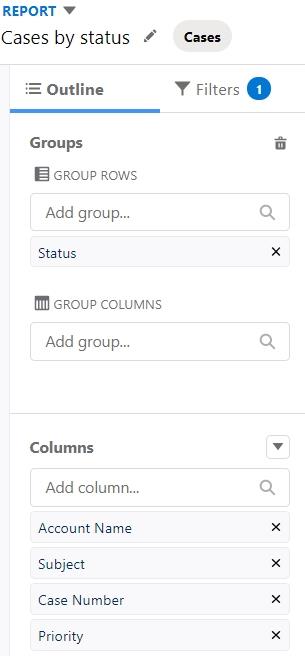
Let’s consider a simple use case: The number of cases per status. For this, we will create a custom report. Let’s name this Snapshot Cases.
But before creating a custom source report, we need to create a separate folder for the report which is not accessible to everyone in the org and later on, we are going to save our custom report in this folder. The source report created here is a summary report which includes fields such as Account Name, Subject, Case Number, and some other fields according to our use case where grouping is done by status.
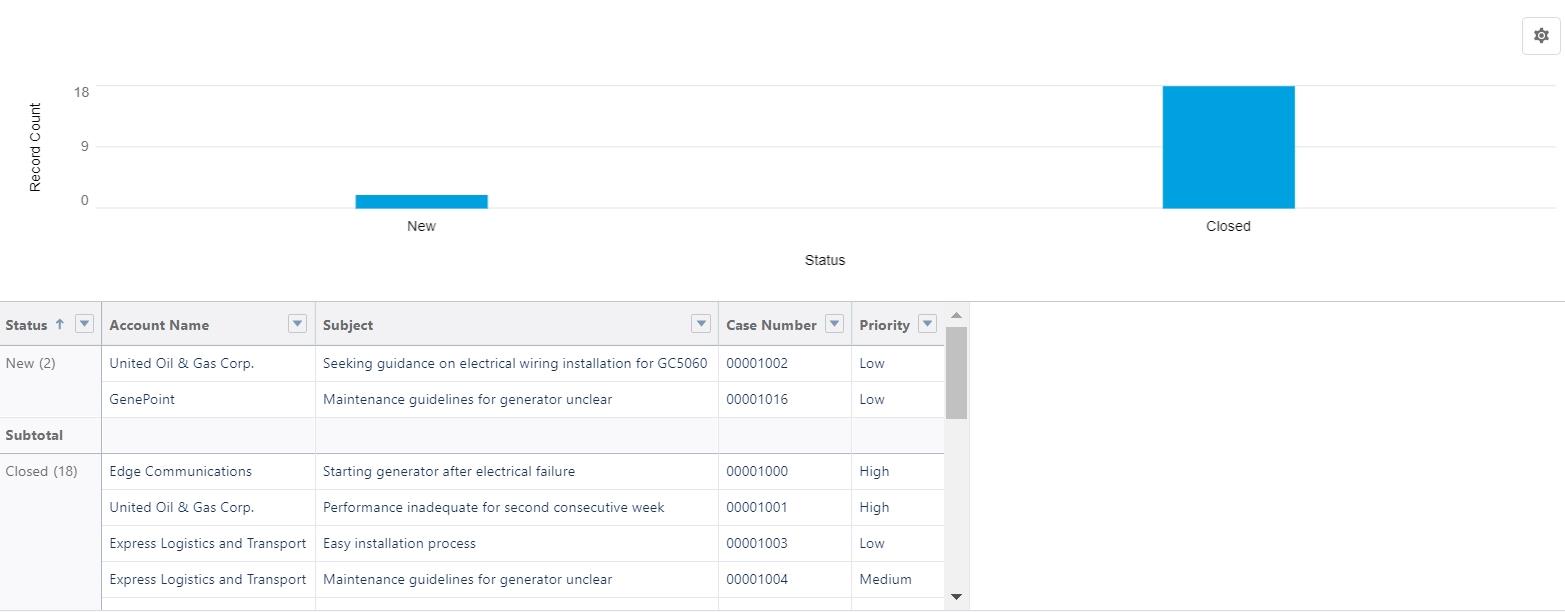
Now, as our custom source report ‘Case by Status’ is ready, we need to create a target object to store the data of this source report.
Creating a Target Object
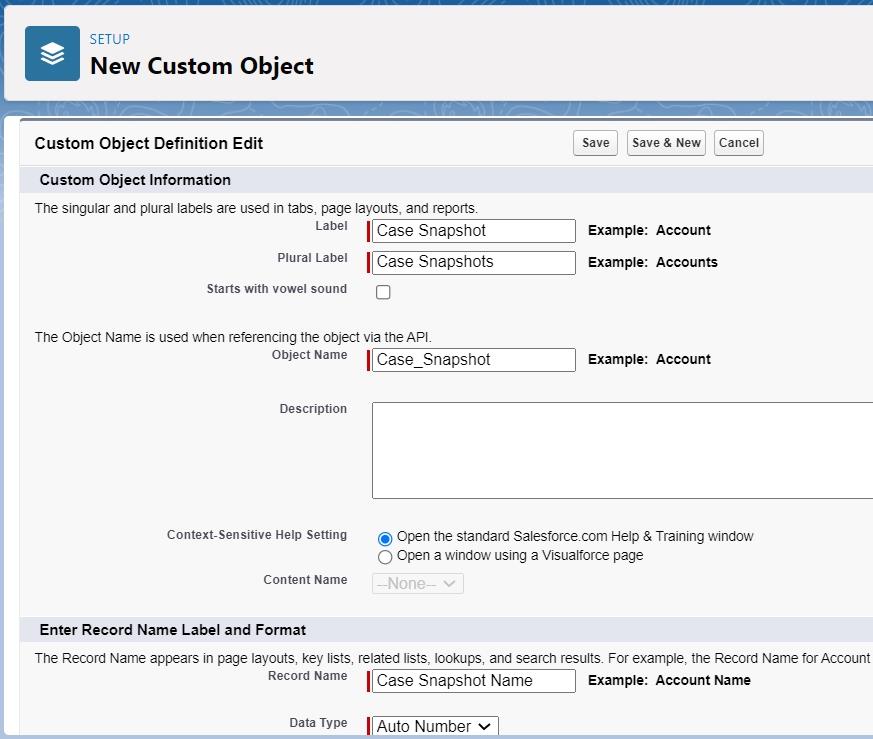
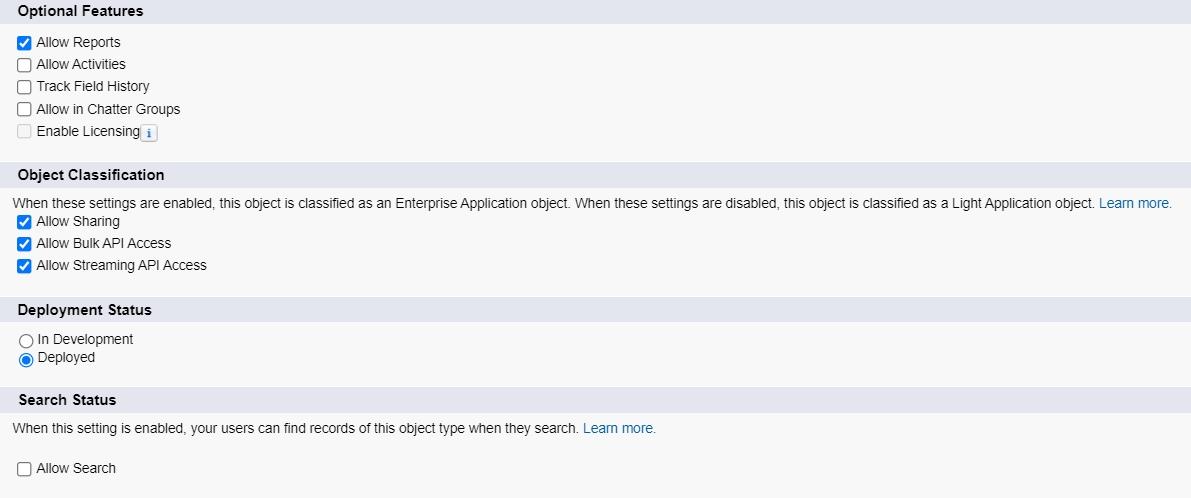
For this target object, we need to create a custom object for the Snapshot by selecting the Object Manager from Setup and clicking on the ‘Create > Custom Object’ button. While creating the custom object, we have to keep in mind to include some important things such as selecting the ‘Allow reports’ checkbox so that this custom object will be available for use in a report without creating a custom report type separately. Also, along with the ‘Allow reports’ checkbox, the deployed checkbox needs to be selected.
Let’s name this custom object as ‘Case Snapshot’ as per this example.
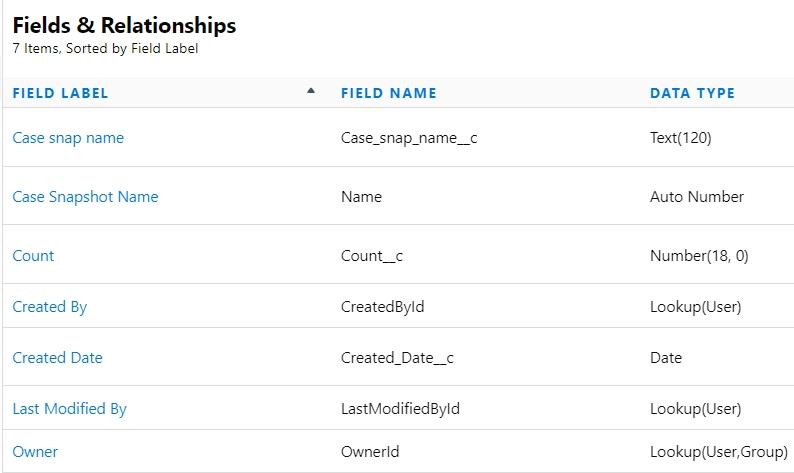
Now, the target object fields must be created after creating target custom object ‘Case Snapshot’, which includes all the fields that are present in the custom report so that the mapping can be done properly. Here, we will use ‘Case Name’ to track the records changing over a specified time period.
As our point of interest is to count the number of cases so, we will create a custom field called ‘Count” with ‘Number’ as the datatype , one ‘Date’ field for created date and one ‘Text’ field for the Snapshot Name. All the custom fields are created by going to ‘Fields & Relationships’ section under the object ‘Case Snapshot’. While mapping, we always need to make sure that the Date fields have ‘Date’ as the data type, Number fields have ‘Number’ as a data type and the ID’s have their own ‘Lookup relationship’ as data type. Rest of the fields like name, status, etc. are all to be assigned the ‘Text’ data types.
Mapping
After we are done with both source report and target object, the mapping has to be done in order to capture the report snapshot data. For this, we need to click:
Setup > Data Management > Analytics > Reporting Snapshots
We will create a new reporting snapshot and let’s name this ‘Case Snap’. After creating the Label and API name for the snapshot, we need to specify the Running User, the Source Report and the Target Object. For this use case, I have selected myself (the system admin) as the Running User, the Source Report is selected as ‘Cases by status’ report and Target Object is selected as ‘Case Snapshot’ object, which we recently created above.
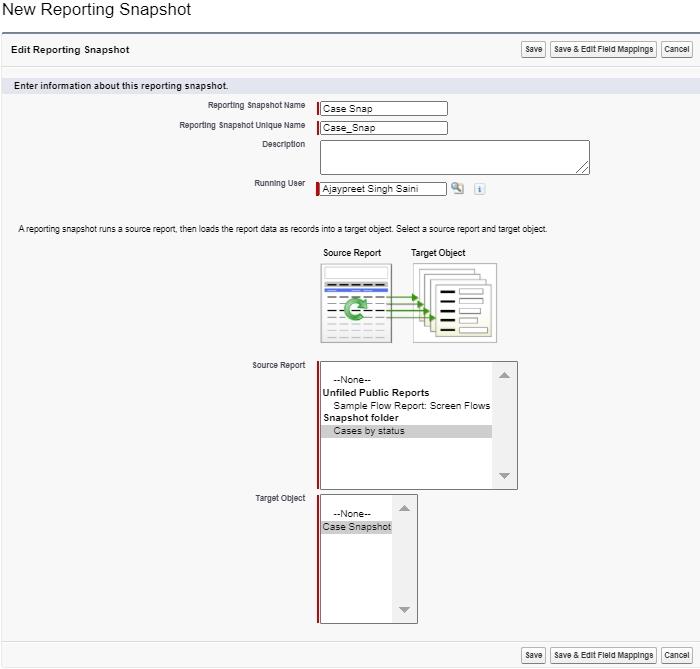
We have to click ‘Save and Edit Field Mappings’ button to start mapping the custom report fields to target object fields.
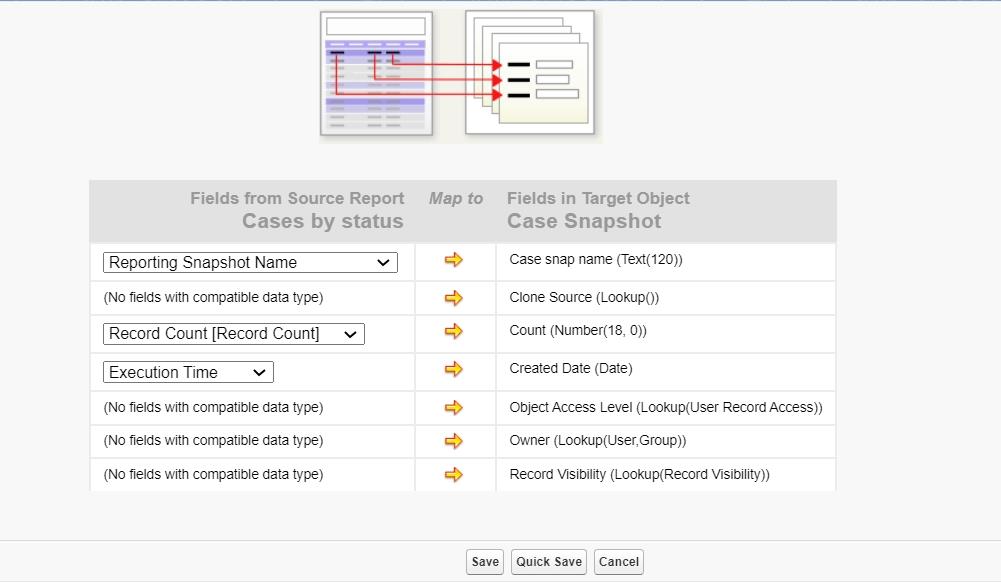
Click Save after completing the process of mapping the fields.
Scheduling Reporting Snapshot
As now we have successfully mapped the fields, let’s look at the final stage of creating an Analytics Snapshot which is scheduling the reporting snapshot. We are performing this step as ultimately our goal is to see the trend in the data over time. For this use case, we are considering weekly reporting, so under the Schedule Reporting Snapshot section, we need to specify the frequency as weekly from the provided choices of daily, weekly or monthly.
The privilege to select a particular day of the week is also provided while scheduling, in case we want to make a selection of a specific day for the schedule to run. There is also a section to choose the time length of the schedule by providing the Start date and End date after which the reporting stops. An important feature is also provided in scheduling which allows sending emails to specific people which can either be Public groups, Roles, Roles and Subordinates and Users or the running user.
For our use case, we will select Allison Wheeler as the recipient of the email who is going to receive this reporting snapshot.

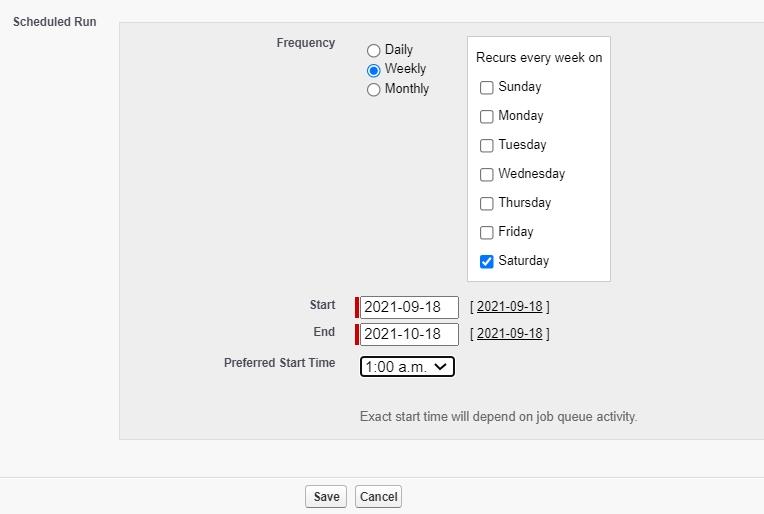
Click Save after completing the scheduling of snapshot.
As we just created the scheduling of snapshot, the captured data will be available after the next scheduled run. Following the receival of data, we can simply go to the ‘Reports’ tab and select Case Snap as the report type. Then, we can pull in the ‘Count’ field and group the report by ‘Created Date’ to show up the record count for all the snapshots run to date and a clear comparison can be made easily by adding bar graph which shows the trends for the cases.
